Shindaiwa DH254 Manuel de l'opérateur
Naviguer en ligne ou télécharger Manuel de l'opérateur pour Outils de jardin Shindaiwa DH254. Shindaiwa DH254 Operator`s manual Manuel d'utilisatio
- Page / 28
- Table des matières
- DEPANNAGE
- MARQUE LIVRES
- LAWN EDGER 1
- Introduction 2
- Attention Statements 2
- Contents 2
- Product Description 3
- Safety (continued) 4
- Specications 5
- ■ Unit Assembly 6
- ■ Operator’s Manual 6
- ■ Assembly Tool (s) 6
- ■ Emission Control Warranty 6
- ■ Safety Glasses 6
- Mixing Fuel 7
- Filling the fuel tank 8
- Starting the Engine 9
- Stopping the Engine 10
- Checking Unit Condition 10
- Operation 10
- Operation (continued) 11
- Maintenance 12
- (0.024 in.) 13
- Maintenance (continued) 14
- Carburetor Adjustment 17
- Long Term Storage 18
- Troubleshooting Guide 19
- LOW POWER OUTPUT 20
- Possible Cause Remedy 21
- Servicing Information 28
Résumé du contenu
WARNING!Always wear eye protection when operating this machine. To minimize the risk of injury, read this manual and familiarize yourself with its con
10Starting the Engine (continued)1. Slide the ignition switch to the “I” (ON) position.Starting A Flooded EngineSlide ignition to OFFOFFIdle the engi
11 Before edging, make sure the area is soft enough so the blade does not bog down. If necessary, water the area before edging. Remove debris and
12WARNING! Never repair a damaged blade by welding, straightening, or by modifying its shape. An altered blade may break during opera-tion, resulti
1310- 15 Hour Maintenancespark plug gap--all modelsClean the spark plug and check the gap at the electrode.CAUTION!Before removing the spark plug, cle
14Maintenance (continued) Remove the shaft bolt, bolt guard, holder A, blade, holder B, and the output shaft collar. Press new grease into the gearc
15Inspect the Gearcase ProtectorThe metal gearcase protector is installed to protect the gearcase ange from damage when working close to side-walks o
16Engine Cover ScrewsEngine CoverMuferMufer GasketMufer BoltsSpark Arrester ScreenSpark Arrester CoverCover Screws1. Remove the engine cover.2. R
17Carburetor AdjustmentEngine Break-InNew engines must be operated a minimum duration of two tanks of fuel break-in before carburetor adjustments can
18Replacing the Edger BladeHolder AEdger BladeLock the shaftHolder BOutput Shaft BoltBolt GuardWARNING!Always wear gloves when handling the edger blad
19Troubleshooting GuideVaporlock.Valve adjustment.Engine hot/heat soaked.Low fuel quality.Valve clearance too tight.Valve clearance too loose.Let cool
2IntroductionThe Shindaiwa H4 series has been designed and built to deliver superior performance and reliability without com-promise to quality, comfo
20Is the engine overheating?Engine is rough at all speeds. May also have black smoke and/or unburned fuel at the exhaust.Operator is overworking the u
21ADDITIONAL PROBLEMSPoor acceleration.Clogged air fi lter.Clogged fuel fi lter.Lean fuel/air mixture.Idle speed set too low.Ignition switch turned off.
22SHINDAIWA LIMITED WARRANTY STATEMENT FOR PRODUCT SOLD IN USA AND CANADA BEGINNING 01/01/2013ECHO, INC’S RESPONSIBILITYECHO Incorporated’s (ECHO, INC
23PURCHASED REPAIR PARTS AND ACCESSORIES• 90-day all applicationsATTENTION ENGINE POWERED PRODUCT OWNERSThis Shindaiwa engine powered product is a qu
24NOTES
25NOTES
26NOTES
27NOTES
ECHO Incorporated.400 Oakwood RoadLake Zurich, IL 60047-1564 U.S.A.Telephone: 1-877-986-7783Fax: 1-847-540-8416www.shindaiwa.com Yamabiko Corporation
3Work SafelyThis machine operates at very high speeds and has the potential to do serious damage if misused, abused or mishandled. To reduce the risk
4The properly equipped operatorAlways operate with both hands rmly gripping the unit.Wear close-tting clothing to protect legs and arms. Gloves offe
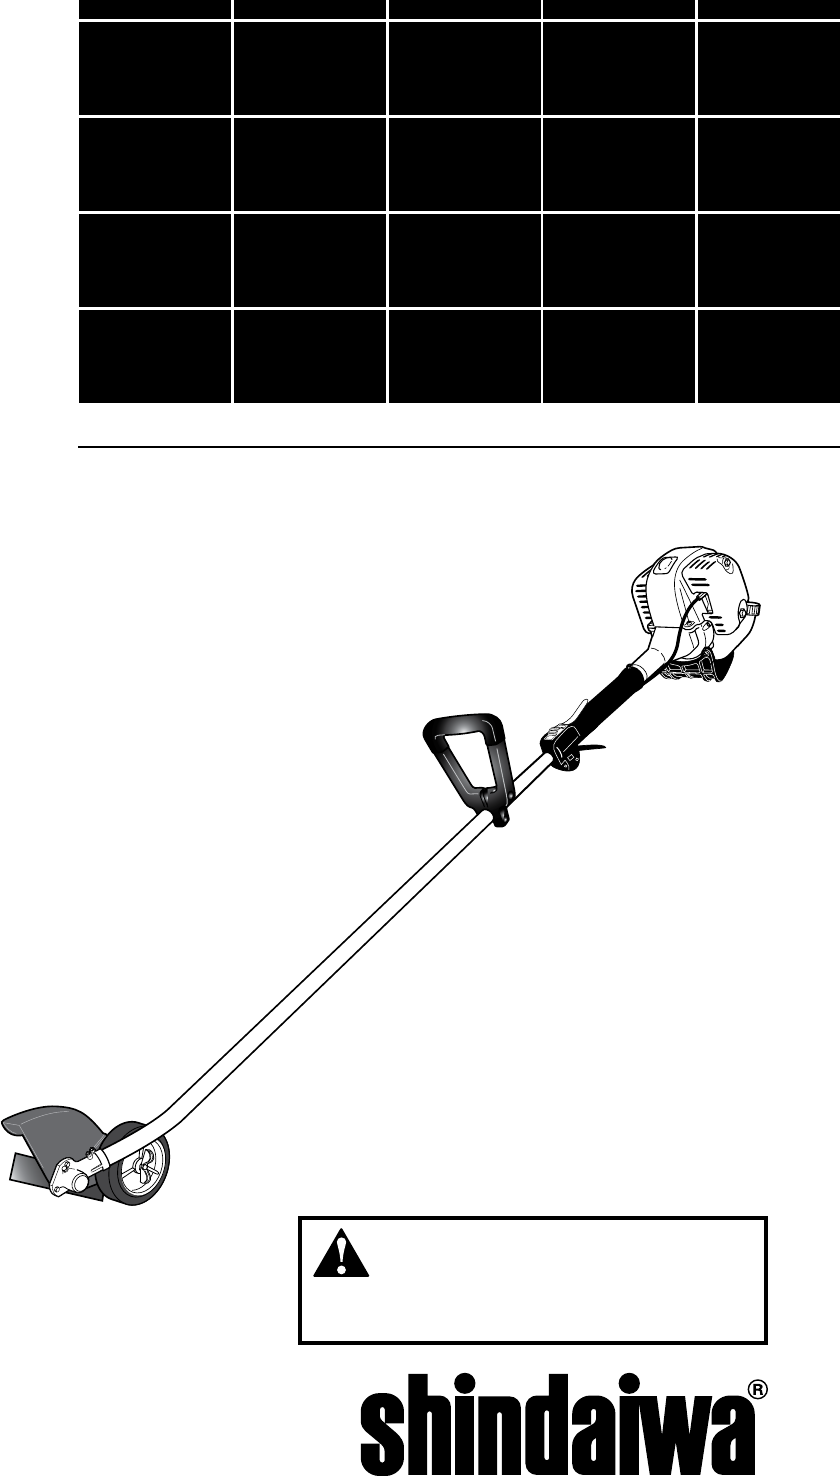
5Product DescriptionUsing the illustration as a guide, familiarize yourself with your machine and its various components. Understanding your machine
6AssemblyPrior to assemblyBefore assembling, make sure you have all the components required for a com-plete unit. Carefully inspect all compo-nents fo
7Remove air cleaner cover4-6 mm(3/16”-1/4”)Throttle Trigger Free PlayAdjust Throttle Trigger Free PlayThe throttle trigger free play should be approxi
8Handling Fuel DANGERFuel is VERY ammable. Use extreme care when mixing, storing or handling or serious personal injury may result.• Use an app
9Slide ignition to ONONFast Idle ButtonMake sure the attachment is clear of obstructions!...and pull recoil starter handle upwardHold the unit rmly..
Plus de documents pour Outils de jardin Shindaiwa DH254

Produits connexes et manuels pour Outils de jardin Shindaiwa DH254

 (20 pages)
 (72 pages)
 (63 pages)
© 2020, manymanuals.fr. Tous droits réservés | 0.392 s |
 Manymanuals.com
 Manymanuals.de
 Manymanuals.fr
 Manymanuals.it
 Manymanuals.pl
 Manymanuals.cz
 Manymanuals.es
 Manymanuals-pt.com
Commentaires sur ces manuels